We were asked to make a thirty second long short film and it needs to have around 3 audio tracks, no dialogue and requires at least one static or dynamic background.
The first step of making the short film with a working green screen is choosing on what you will replace the green screen with since there is no dialogue we didn't need to work on a script or doing a location evaluation sheet since we were only going to the TV studio.We recorded with a 16 GB, class 10 SD card this allowed us to capture more footage with a high quality so we would have a large selections of clips to chose from when we started editing . Secondly you'll need to do any action and have it recorded on any kind of video camera. Then when you are done we had to move onto the editing software since its the only way that the project would carry on. The programming software we used was Adobe Premier Pro this allows for tighter control of the shots once they have been imported. This can been seen in different professional made movies since some times even they can't recreate what is needed by physical props and or the actual location. I will show a example picture below and I will also link them.
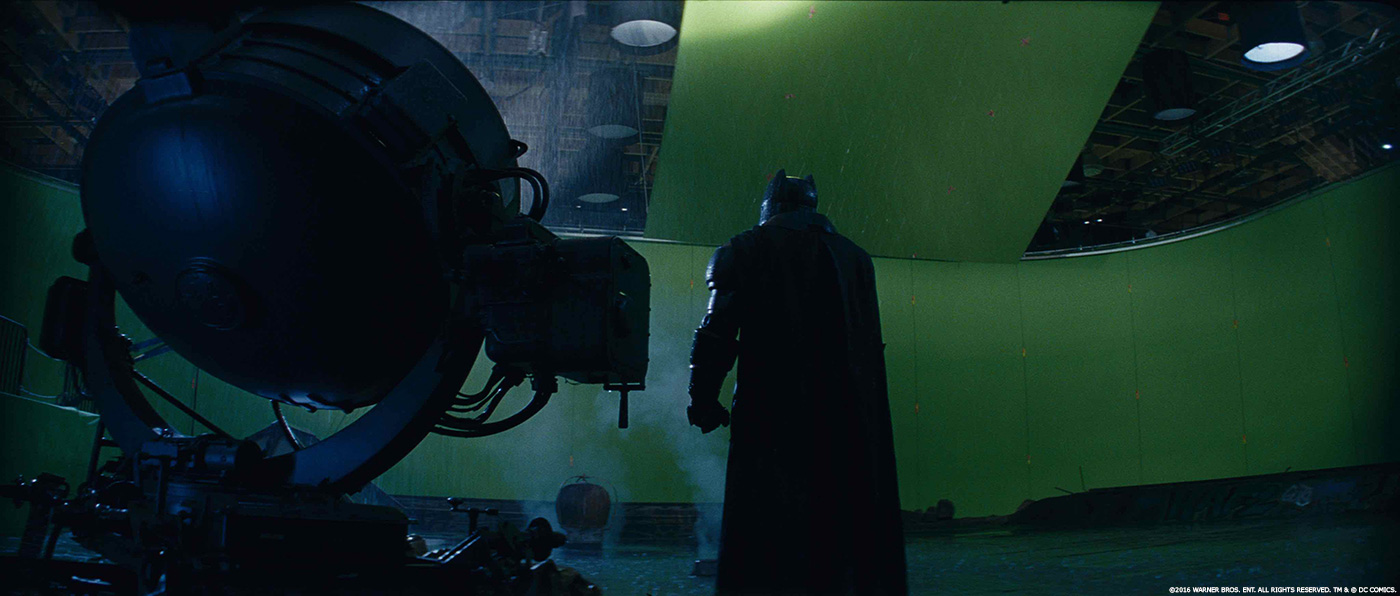 Link - Batman (Before)
Link - Batman (After)
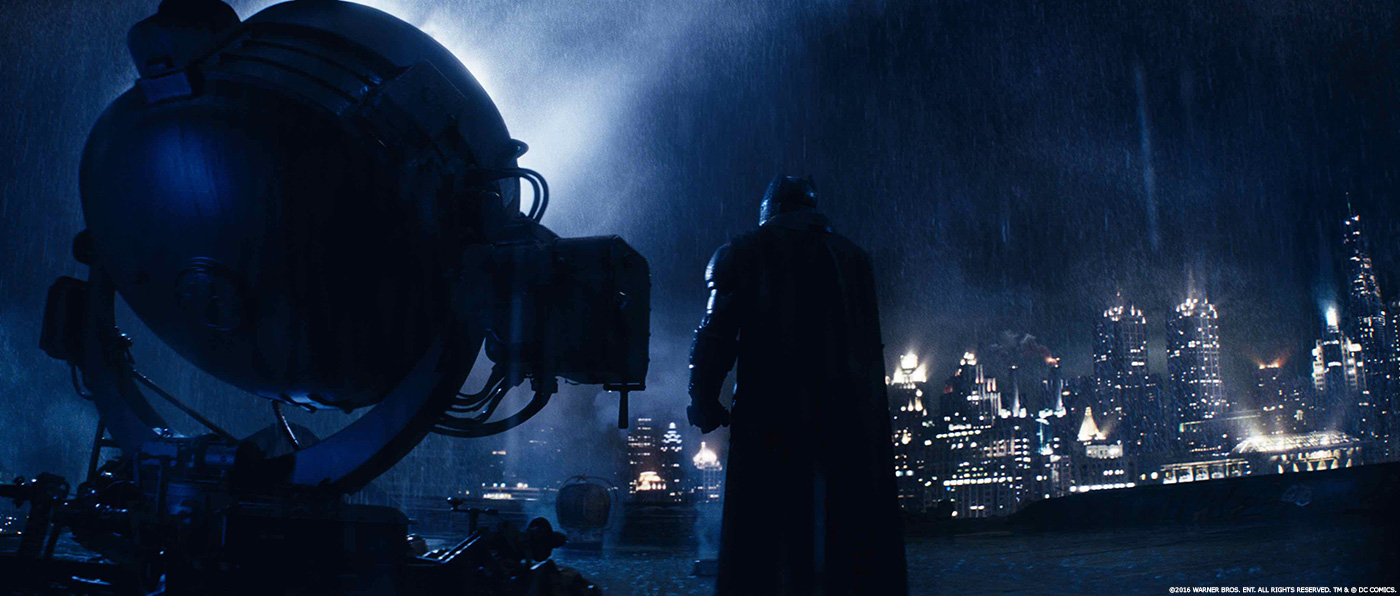
So after I've imported all of the shots from the SD card onto the editing program. With this I was able to create a skeleton edit and thanks to this I created a linear story without any post editing, then I down loaded a few effects from YouTube as well as a background which I wanted to use. Then all I had to do was place the audio and the the background accordingly. I had to also do a voice over so I went to the studio booth and recorded so tracks these will be my narration on what is basically happening through this linear story. After all of this I export the media file as a AVID and uploaded it to YouTube where I can get constructive criticism for my work. However I did have some problems with the editing software, firstly it was extremely slow on the start up procedure as well as loading the media files I needed, that also included all of the items I've downloaded. Luckily for me that I was able to produce a suitable piece of work with the editing software.
If I had to do any thing differently, i would use more effects since it would push my editorial skills since there will be more variables to deal with and also to line up with the time line. Another thing i would change would be the Actors range of movements and emotions because as it is now the actor looks lost on what his purpose is.


